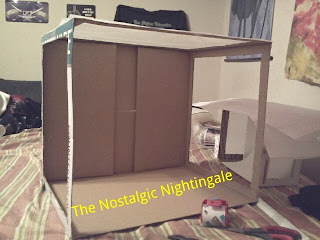
I was inspired to make a photo light box after seeing Flax & Twine's picture of their photo light box on pinterest.com. Lucky for me Flax & Twine posted a picture tutorial that really sparked me to get up and make my own. I'm really excited & can't wait to take and post all sorts of better quality photos for you guys!

Materials I Used:
~ empty sturdy cardboard box
~ ruler
~ pencil
~ box cutter
~ white tissue paper
~ clear packing tape
~ white poster board
~ scissors
What I Did:
1) Removed top opening flaps using the box cutter.
2) Measured, marked, & cut out a 1" square from three of four sides of the box.
3) Cut the white tissue paper down to size and secured it over the exterior of the three square holes using the packing tape.
4) Measured and cut the poster board to fit the interior width of the box.
5) Secured the white poster board with tape if desired, and it's all done!
Notes) When using a box cutter, score the line several times (at least 3) to cut through the box instead of trying to cut straight through it all at once.
To use a photo light box: place the box in as much light as possible then place the object(s) you wish to photograph inside the box. Snap the picture and adjust the brightness, sharpness, crop the photo, and do anything else you desire (such as add text) in a photo editor program or app if using a smart phone.
Now to show you guys an example of the difference it makes using a light box.
Now to show you guys an example of the difference it makes using a light box.


See? The image using the light box appears clearer and much more professional.
(Wondering about the ribbon wrapped soap bars? Check back soon for the tutorial!)


No comments:
Post a Comment